The Styles pane is a way of applying formatting to paragraphs of text. In Microsoft Word, it can be found on the Home tab, where it appears as a series of white boxes with the subheading “Styles." Each white box represents a different formatting option for individual lines or paragraphs of text. Each formatting option can be modified according to the document's needs.
Creating and using preset styles provides access to two main functions: (1) a navigation pane and (2) an auto-generated table of contents. As such, it is beneficial to use the Styles pane in long documents. However, if you want your documents to yield the same formatting, you can apply your premade styles to every document created in Microsoft Word.
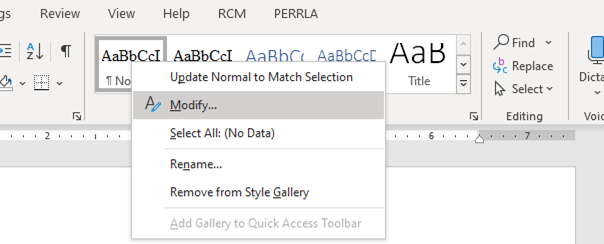
To edit a particular style:
- Go to the Home tab, and to the “Styles" option.
- Right click on the square representing the type of formatting you'd like to modify (ex., Normal, Heading 1, etc.).
- Then click “Modify..." as depicted in Figure 1. This will open a dialogue box with many different formatting options.
- Format the style according to the formatting needed.
- To make this style available in future documents, select “New documents based on this template" at the bottom of the screen.
Figure 1
Select Modify in the Styles Pane
To apply styles compliant with APA formatting, use the instructions presented in the following sections.
Normal (Paragraphs)
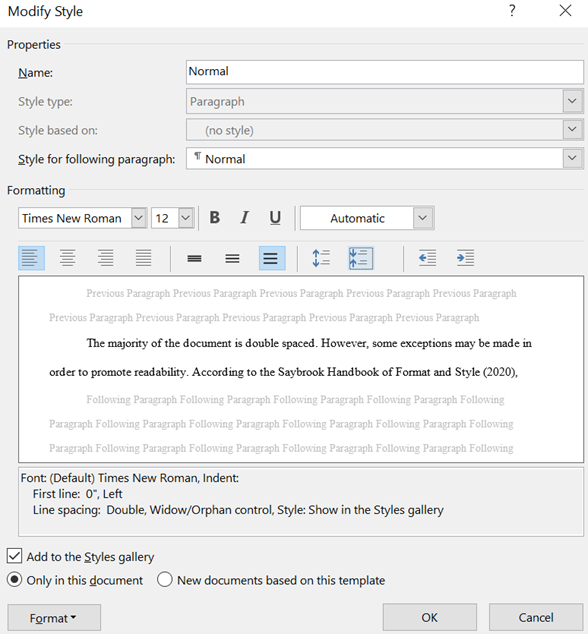
Use this style for the body text of a paper or longer work.
- Right click the “Normal" box, click “Modify," and modify the preset formatting of font type, size, color, and spacing to match APA requirements.
- In the “Modify" dialogue box, click “Format" at the bottom left, then select “Paragraph." This will bring up different options. Under “Indentation" and “Special," select “First Line." This should bring up a 0.5" number in the box to the right. This ensures the first line of each new paragraph is indented 0.5" from the left-hand margin. Click “Okay."
- Click “Okay" and the formatting should be in place.
- To apply the Normal settings to a paragraph, put the cursor somewhere in that paragraph, then click the “Normal" box in Styles.
Figure 2 depicts the settings needed for the “Normal" setting in the styles pane.
Figure 2
Normal Settings
Headings (Levels 1-3)
The Styles pane can be used to create an automatically generated table of contents with updatable page numbers. Each heading to appear in a table of contents should be tagged with a particular style, specifically Heading 1, Heading 2, and Heading 3. See Heading Levels for specific formatting requirements.
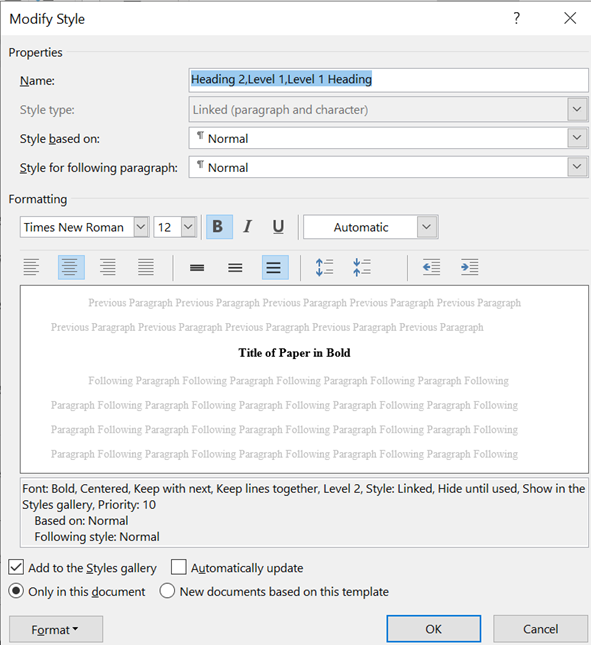
- Heading 1: Use this style for APA level 1 headings.
- Right click the “Heading 1" box, click “Modify," and modify the preset formatting to match APA requirements for font type, size, color, and spacing.
- In the “Modify" dialogue box, click “Format" at the bottom left, then select “Paragraph," then “Line and Page Breaks," and tick the boxes for “Keep with Next." This will keep headings from being stranded at the bottom of a page.
- Headings 2 and 3: Use the other Heading styles (Heading 2, Heading 3, etc.) as needed. Modify each style to match APA requirements following the instructions given for Heading 1.
- Headings 4 and 5: Due to the rare use of these heading levels and their complex nature, instructions will not be provided. However, if your document requires the use of these headings and you would like guidance, please contact us at [email protected].
Figure 3 shows the settings needed to generate a level 1 heading.
Figure 3
Level 1 Settings in the Style Pane
Block Quotes
The Quote style can be set aside and modified for block quotations. Depending on the document, there are different formatting requirements for block quotes.
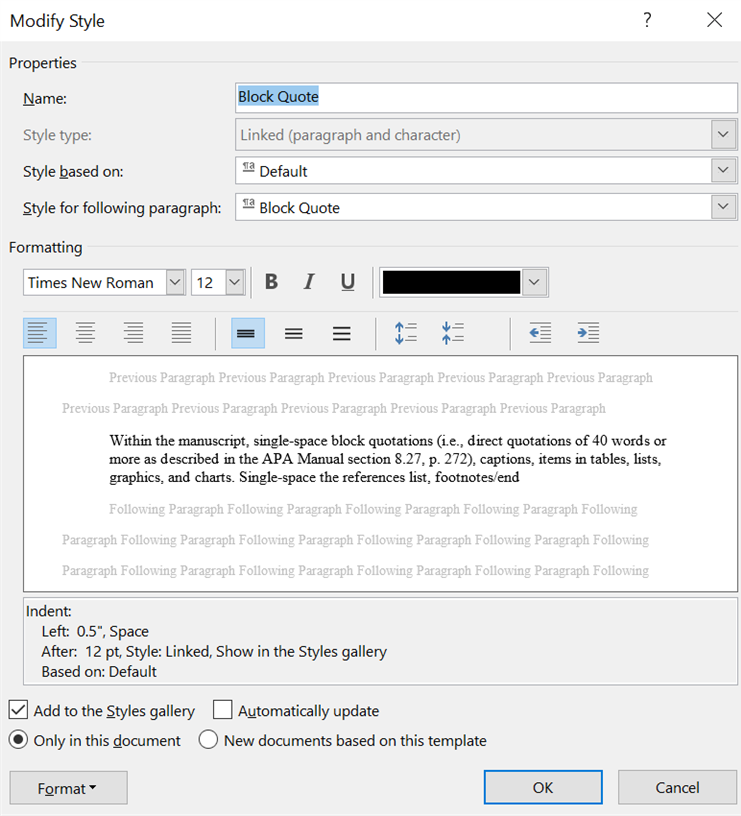
- Dissertations: To format block quotations, follow the formatting instructions as given for Heading 1 and modify the font type, size, color, and spacing (which should be Single). Set the Left indentation to 0.5". Then, click “Format," “Paragraph," and set “After" to 12pt. This will add a space after the block quote so that it is formatted properly with the double-spaced text around it. The box marked “Don't add space between paragraphs of the same style" should not be checked. Click “Okay," and “Okay."
- Student papers: To format block quotations, follow the instructions given for Dissertations, but keep spacing double and do not apply any extra spacing before or after.
Figure 4 depicts the final settings for block quotes of dissertations.
Figure 4
Block Quotes (Dissertations)
Reference Entries
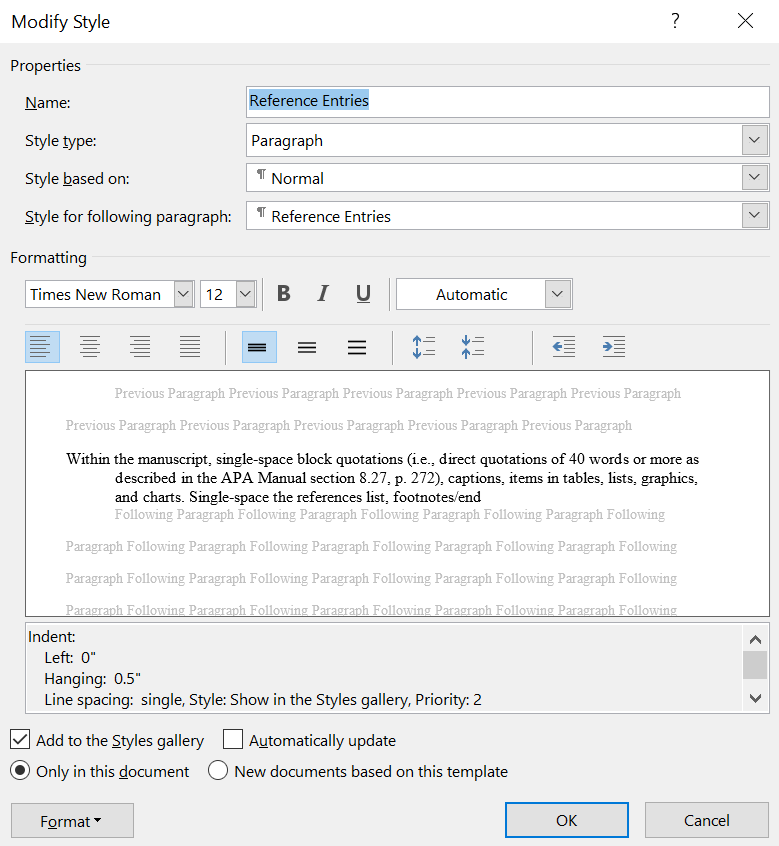
A reference style can be created for entries in the reference list.
- Follow the formatting instructions as given for Heading 1 and modify the font type, size, color, and spacing (double for student papers, single for dissertations).
- Set left indentation to 0" and hanging to 0.5." Then, click “Format," “Paragraph," and ensure that “After" and “Before" are both set to 0pt.
- The box marked “Don't add space between paragraphs of the same style" should not be checked.
- Click “Okay," and “Okay."
Figure 5 shows the final settings for refence entries of a dissertation.
Figure 5
Reference Entries (Dissertations)