Adding Page Numbers
To add page numbers using Microsoft Word, utilize the following steps:
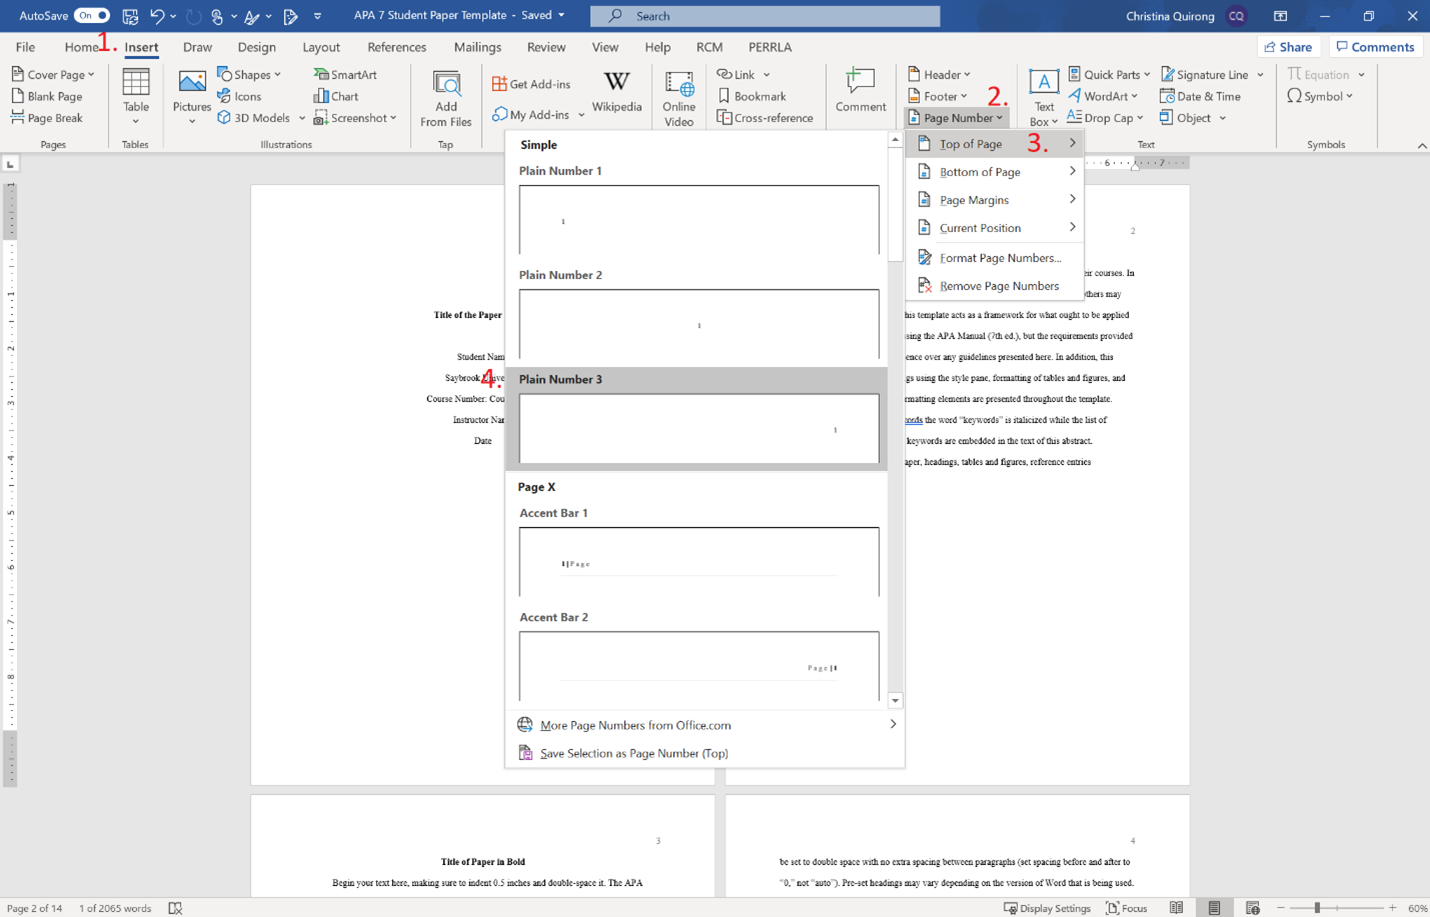
- Select the "Insert" tab at the top of the page.
- Then, in the "Header & Footer" section, select "Page Number," which will open a drop-down menu.
- Select "Top of Page."
- Select the option "Plain Number 3," which places the page number in the top right corner of the page.
Note: Ensure that the font style and size is the same as the rest of the document. To edit this, double click the page number at the top of the page to highlight it and modify using the same strategies as the rest of the document.
Reformatting Page Numbers
In some cases, you may need to use a variety of modifications to your page numbers.
For some documents, such as dissertations, Roman numeral pagination may be required. To make this modification, utilize the following steps:
- Double click on the header. Doing so will open header/footer formatting options in the task bar.
- In the task bar, select "Page Number" and then, on the drop-down menu, select "Format Page Numbers…"
- In the field "Number Format," select the style of number needed for your document/section. Additionally, you may edit the "Start at" if the first number needed is different than 1.
Note that, if you are using multiple sections (see “Page & Section Breaks"), when "Continue from previous section" is selected, the page number will follow the previous section. Additionally, at the top of the page in the "Header & Footer" menu, ensure that "Link to Previous" is NOT selected. If it is, this will cause errors in formatting and complicate the process.